How to Build a Garage Shelving Unit: Step-by-Step
Build a heavy-duty 48-inch wide garage shelving unit using standard 2x4 lumber and panels with this exact cut list and build guide.
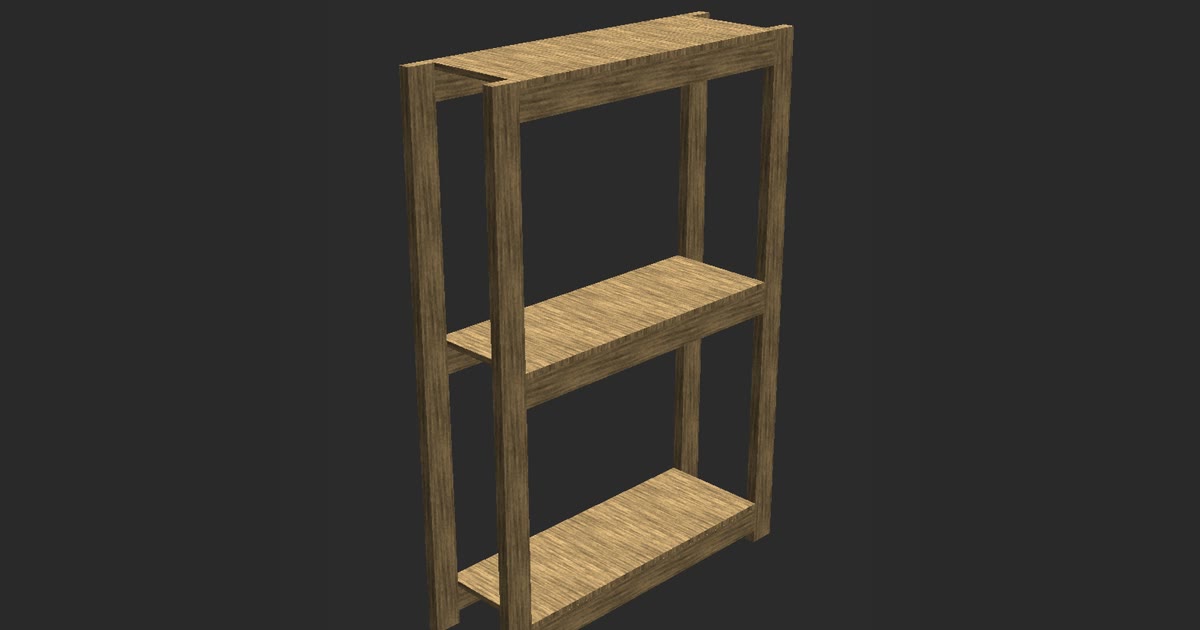
Learning how to build a garage shelving unit comes down to cutting sturdy framing lumber to size and assembling the frame in the correct order. With four 2x4 uprights, six horizontal support rails, and three fitted panel surfaces, you create a dedicated storage station that keeps heavy totes and tools off damp concrete floors.
This design was made in TimberTinker and built board by board on film, matching the video build step for step. Below you will find the complete 13-piece cut list along with the full assembly sequence.
| Finished size | 48 in wide × 15 in deep × 70 in tall |
|---|---|
| Lumber | 2x4, panel |
| Shelf heights | 6 in, 38 in, 70 in |
| Pieces | 13 |
| Build order | legs → shelf-1 → shelf-2 → shelf-3 |
Cut list
| Qty | Part | Lumber | Length |
|---|---|---|---|
| 4 | Leg | 2x4 | 70 in |
| 2 | Shelf-1 | 2x4 | 41 in |
| 1 | Shelf-1 | panel | 15 in |
| 2 | Shelf-2 | 2x4 | 41 in |
| 1 | Shelf-2 | panel | 15 in |
| 2 | Shelf-3 | 2x4 | 41 in |
| 1 | Shelf-3 | panel | 15 in |
Step by step
- Cut the four 2x4 legs to 70 in, the six 2x4 framing rails to 41 in, and the three 0.75 in thick panels to 15 in by 41 in.
- Mark shelf elevation lines on the inside faces of the four legs at 6 in, 38 in, and 70 in from the bottom ends.
- Lay two legs flat, position the bottom 41 in rails at the 6 in mark, pre-drill pilot holes, and drive screws to form the base frame.
- Attach the remaining two legs to complete the lower four-post structure for shelf-1.
- Fasten the shelf-1 panel onto the bottom rails to lock the lower structure square.
- Position the two middle 41 in rails at the 38 in marks, level them, and fasten them to the legs.
- Secure the shelf-2 panel across the middle rails with wood screws.
- Mount the top two 41 in rails flush with the top of the legs at the 70 in elevation.
- Position the top shelf-3 panel with its front edge aligned forward and screw it down firmly.
Dimensions and Stance: Sizing Your Garage Storage
The finished Chunky Garage Shelving unit is 48 in wide, 15 in deep, and 70 in tall. This narrow footprint works well along garage side walls where vehicle doors need room to swing open. Because garage floors often collect water from rain or melting snow, the bottom tier sits 6 in above the ground. Lifting the lower shelf keeps cardboard boxes dry while allowing you to sweep debris underneath.
The three storage tiers are spaced to handle standard shop items. The bottom shelf sits at 6 in up from the floor, the middle shelf sits at 38 in, while the top shelf sits at 70 in. This arrangement leaves a tall lower opening of roughly 30.5 in between framing members, accommodating bulky storage tubs. The top tier sits at eye level for quick access to hardware bins.
The top shelf features a 1 in overhang past the outer edges of the frame. This projection gives the unit a clean appearance and makes it simple to pull the shelf flush against a wall even if the base encounters baseboard trim. Before cutting wood, you can review these proportions in TimberTinker to see how the spacing fits your gear.
Materials and the Exact 13-Piece Cut List
Framing this project requires standard construction 2x4 boards and sheet panels. A standard 2x4 has actual dimensions of 1.5 in by 3.5 in, so factor that difference into your planning. The shelf surfaces use panels that are actually 0.75 in thick. When cut to 41 in long and 15 in deep, these panels sit securely across the horizontal framing without sagging.
The build requires exactly 13 pieces of cut lumber. Start by cutting the 4 legs from 2x4 stock at 70 in long. Next, cut 6 horizontal framing rails from 2x4 stock at 41 in long: two for shelf-1, two for shelf-2, and two for shelf-3. Finally, cut 3 panel tops measuring 0.75 in thick by 41 in long by 15 in deep for each tier.
Keeping your cuts square is critical when assembling dimensional lumber. Use a stop block on your miter saw so all 70 in legs and all 41 in framing rails match in length down to the millimeter. Reviewing the cut list in TimberTinker groups your cuts by material before making your first saw pass, saving scrap wood and store trips.
How to Build a Garage Shelving Frame Board by Board
Assembly begins by standing up the four 70 in legs. Lay two legs flat on your garage floor, parallel to each other. Mark the reference heights on the inside faces at 6 in, 38 in, and 70 in from the bottom. Mark the opposite pair of legs the exact same way. These marks establish the alignment points for the horizontal rails and keep the shelves level across the 48 in width.
Install bottom shelf-1 first. Place the two 41 in rails between the legs at the 6 in mark. Fasten each rail through the 2x4 face into the uprights using heavy-duty wood screws. Drop the 15 in wide panel for shelf-1 into position over the framing and secure it. Starting at the base stabilizes the four legs, creating a rigid foundation that prevents twisting while you work upward.
Move up the frame to set shelf-2 at the 38 in mark. Fasten the two 41 in rails to the inner faces of the legs, checking with a spirit level before driving your screws home. Secure the shelf-2 panel into the rails. Finally, mount shelf-3 at the 70 in mark at the top of the legs. Set the shelf-3 panel in place so the top boards extend forward evenly, then drive screws through the framing to lock the top tier permanently.
Sanding, Fastening, and Finishing for Garage Durability
Garage shelving must endure temperature swings and shifting loads. Use 2.5-inch or 3-inch construction screws to join the 2x4 frame pieces together. Always pre-drill pilot holes when driving screws close to board ends. Pre-drilling prevents construction pine from splitting along the grain, preserving joint strength over years of loading.
Take twenty minutes to sand the rough lumber before putting the unit into service. Construction lumber often carries stamped ink and splinters. Hit the edges and panel surfaces with 120-grit sandpaper on a random orbital sander. Breaking the sharp edges makes handling storage bins smoother and prevents painful splinters when you reach for items.
Garages experience high humidity, especially during rainy seasons and cold winters. Apply two coats of exterior-grade polyurethane or latex porch paint to the assembled wood. Sealing the end grain at the bottom of the 70 in legs stops bare pine from soaking up dampness directly off the concrete floor slab.
Building your own garage storage gives you a customized, sturdy organizer that holds up far better than cheap plastic racks. With 13 precise pieces of lumber cut to size and assembled from the ground up, you gain three generous storage decks that keep your tools and supplies protected.
Questions
How much weight can a 2x4 garage shelf like this hold safely?
When built with 2x4 framing rails spanning 41 in and topped with 0.75 in panels, each shelf tier readily holds heavy storage totes and shop supplies without sagging. The solid lumber frame carries bulky garage equipment securely as long as weight is distributed across the deck.
Should this garage shelving unit be anchored to the wall studs?
Yes, anchoring is recommended. At 70 in tall and 15 in deep, the unit has a relatively narrow stance. Driving structural screws through the rear framing rails into wall studs prevents accidental tipping when placing heavy totes on the top tier or if the shelving gets bumped.

Try TimberTinker for yourself.
Get TimberTinkerWant more like this? Leave your email and I'll send the good stuff only.