How to Build a Lamp Table: Step-by-Step Guide
Build a clean, modern 24-inch lamp table from standard lumber using this precise 13-piece cutting and assembly plan.
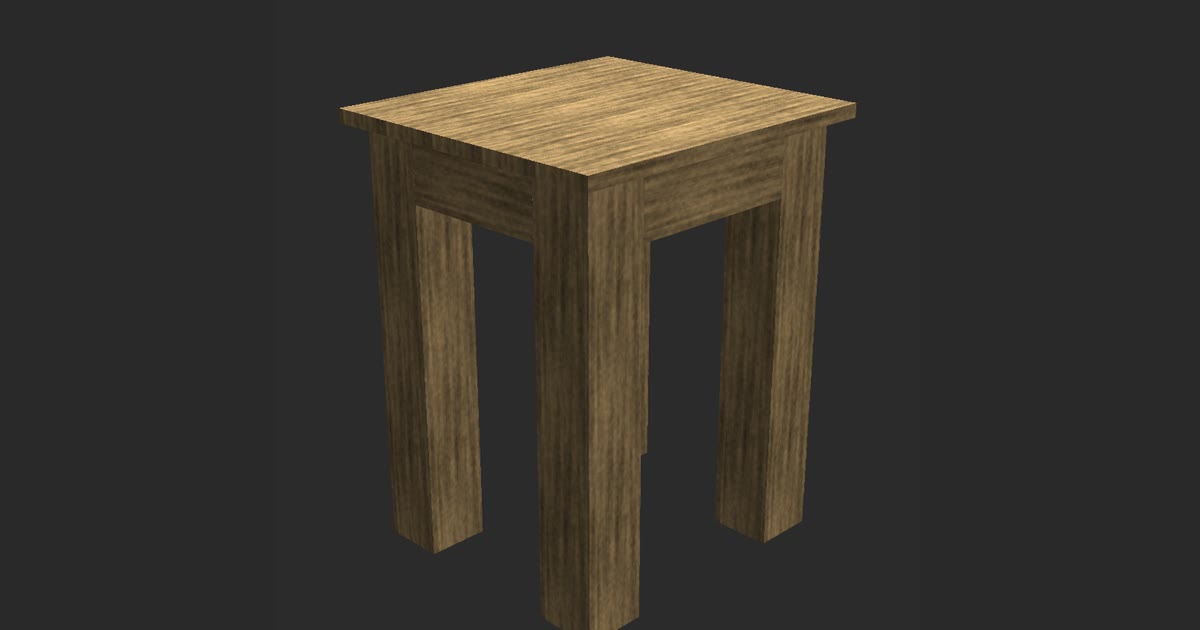
To build a lamp table, construct a base from four 4x4 legs and four 2x4 aprons, then fasten five 1x4 top boards across the frame. This project yields a finished table measuring 19 inches wide, 17.5 inches deep, and 24 inches tall using standard off-the-shelf lumber.
This guide details the lumber dimensions, an exact 13-piece cut list, step-by-step frame assembly, and smooth finishing methods for your home workshop.
| Finished size | 19 in wide × 17.5 in deep × 24 in tall |
|---|---|
| Lumber | 4x4, 2x4, board |
| Pieces | 13 |
| Build order | legs → aprons → top |
Cut list
| Qty | Part | Lumber | Length |
|---|---|---|---|
| 4 | Leg | 4x4 | 23.25 in |
| 2 | Apron | 2x4 | 10 in |
| 2 | Apron | 2x4 | 8.5 in |
| 5 | Top board | board | 19 in |
Step by step
- Cut four 4x4 legs to 23.25 inches using a miter saw.
- Cut two 2x4 aprons to 10 inches and two 2x4 aprons to 8.5 inches.
- Cut five 1x4 boards to 19 inches for the tabletop.
- Sand all individual parts through 80, 120, and 180 grits before assembly.
- Drill pocket holes on the interior faces of the four 2x4 aprons.
- Assemble the base frame by screwing the aprons flush to the top ends of the 4x4 legs.
- Lay the five top boards flat and center the base frame upside down on top.
- Fasten the top boards to the aprons with an even 1-inch overhang on all sides.
- Sand the completed table to 220 grit and apply your chosen finish.
Dimensions and Sizing for a Modern Lamp Table
A lamp table needs specific proportions to work comfortably beside living room seating. At 24 inches tall, the surface matches the standard armrest height of most armchairs and sofas, putting a reading lamp switch within easy reach. The tabletop measures 19 inches wide and 17.5 inches deep. This gives ample area for a lamp base, a book, and a drink coaster without overcrowding a room corner or encroaching on walking space.
The base frame consists of four chunky 4x4 legs linked by 2x4 aprons, leaving the lower area completely open. Omitting lower shelves keeps the silhouette light and prevents dust buildup near floor vents. It also allows electrical cords from your lamp to drop straight down toward wall outlets without awkward routing around lower stretchers.
A uniform 1-inch tabletop overhang extends past the outer face of each leg on all four sides. The underlying base frame measures 17 inches wide by 15.5 inches deep. This 1-inch perimeter setback creates clean shadow lines under the top surface, balancing the thick 3.5-inch leg profiles with a crisp architectural profile.
Lumber Selection and the Complete 13-Piece Cut List
Building this table requires three types of construction lumber: 4x4 posts, 2x4 framing studs, and 1x4 finish boards. Understanding actual versus nominal lumber dimensions is essential before making a single cut. A standard 4x4 actually measures 3.5 inches by 3.5 inches. A standard 2x4 measures 1.5 inches by 3.5 inches, while a 1x4 board measures 0.75 inches thick by 3.5 inches wide. Knowing these true dimensions keeps your final assembly square and accurate.
The complete design requires exactly 13 pieces. You need four legs cut from 4x4 stock at 23.25 inches. For the base frame aprons, cut two pieces of 2x4 lumber to 10 inches and two pieces to 8.5 inches. The tabletop requires five 1x4 boards cut to 19 inches. When placed edge to edge, the five 3.5-inch wide boards create the exact 17.5-inch tabletop depth.
Modeling the lumber layout in TimberTinker helps you verify part lengths and board counts before heading to the lumber yard. TimberTinker calculates exact cut lists and visualizes joint placements, which prevents costly miscuts and material waste. When purchasing your stock, select straight boards with minimal knot clusters near the ends to ensure clean joinery faces.
How to Build a Lamp Table: Step-by-Step Assembly
Assembly begins with the legs. Crosscut your four 4x4 pieces to exactly 23.25 inches, making sure each end is cut at a true 90-degree angle. If your lumber has rounded edges, trim a thin 1/8-inch skim cut from all four faces on a table saw to create crisp square corners. This squaring process ensures the 2x4 aprons sit completely flush against the leg faces during glue-up and assembly.
Next, connect the aprons to the legs to establish the rigid base frame. Drill two pocket holes into both ends on the inside face of each 2x4 apron. Position the two 10-inch aprons along the wide sides and the two 8.5-inch aprons along the short sides. Align the top edges of the aprons flush with the leg tops, or set them back slightly if you prefer a decorative reveal. Reviewing the 3D joint placement in TimberTinker ensures your pocket hole screws will not collide at the interior corners of the 4x4 posts. Clamp each joint firmly before driving 2.5-inch pocket hole screws.
Complete the build by mounting the tabletop. Lay out the five 19-inch top boards on a flat surface, arranging the grain patterns for an appealing look. Center the assembled base frame upside down over the inverted tabletop boards, checking for an even 1-inch overhang on every edge. Fasten the boards to the aprons using figure-eight tabletop fasteners or pocket screws driven through predrilled clearance holes, securing each board firmly to the frame.
Sanding, Edge Profiling, and Finishing Options
Dimensional lumber usually carries milling marks, stamps, and small surface dents that require thorough sanding. Begin sanding all surfaces with 80-grit abrasive paper to flatten joints and erase mill glaze. Progress through 120-grit, 180-grit, and finish at 220-grit on all visible surfaces. Wipe away sawdust between each grit change using a dry microfiber cloth or vacuum brush.
After sanding the flats, break all sharp exterior edges with a hand sanding block or a small 1/8-inch roundover bit. Softening the perimeter of the tabletop and the lower corners of the 4x4 legs prevents splintering and feels smooth to the touch. Pay extra attention to the end grain on the top boards, as end grain absorbs finish rapidly and can darken unevenly if left coarse.
For the final finish, a quality hardwax oil or a satin wipe-on polyurethane works well on pine and fir. Hardwax oil penetrates deep into the wood fibers, leaving an organic, matte sheen that highlights natural grain under the warm glow of a table lamp. Polyurethane provides added moisture resistance against water rings and daily wear. Apply two to three thin coats, scuffing lightly with 320-grit paper between applications.
Building a custom lamp table from dimensional lumber is a straightforward weekend build that brings clean, functional furniture into your living space. With accurate cuts, square joints, and a smooth protective finish, this compact table will support your favorite lighting piece for years to come.
Questions
What is the best joinery method to attach the 2x4 aprons to the 4x4 legs?
Pocket hole joinery is the fastest and strongest method for standard lumber. Drill two pocket holes into the inside face of each apron end using a 1.5-inch material setting, then fasten them to the 4x4 legs with 2.5-inch pocket screws and wood glue.
How do you attach the top boards while allowing for natural wood movement?
Use figure-eight desktop fasteners or slotted pocket holes inside the aprons. These fasteners hold the boards tight against the frame while permitting seasonal expansion and contraction across the board width, preventing the solid wood top from cupping or cracking.

Try TimberTinker for yourself.
Get TimberTinkerWant more like this? Leave your email and I'll send the good stuff only.