How to Build a Clean Lined Nightstand Step by Step
Build a modern 22-by-17.5-inch nightstand from standard lumber using this precise 16-piece cut list and step-by-step assembly guide.
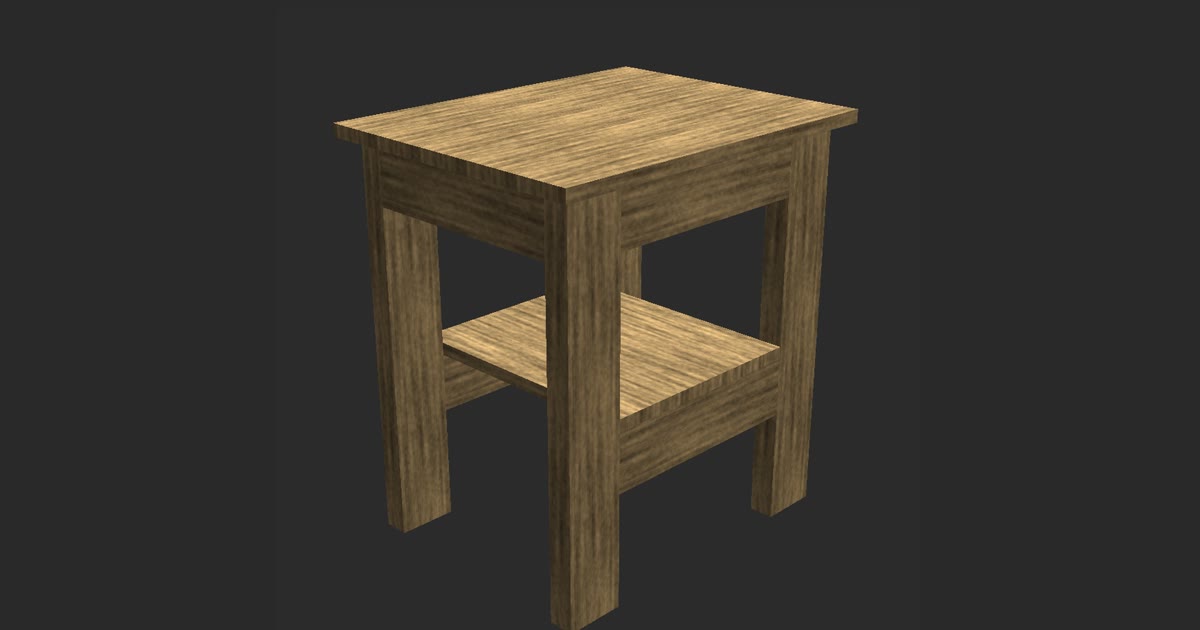
To build a clean lined nightstand, assemble a rigid four-leg base from standard 2x4 lumber and top it with five edge-joined boards. You create clean, flush seams by orienting the wide faces of the lumber consistently and keeping fasteners concealed on the inside faces of the rails. With square cuts and careful alignment, off-the-shelf boards transform into a balanced modern side table.
This guide details the complete build process from rough stock to completed bedside table. You will find the exact 16-piece cut list, verified dimensional lumber measurements, step-by-step assembly instructions, and sanding tips.
| Finished size | 22 in wide × 17.5 in deep × 24 in tall |
|---|---|
| Lumber | 2x4, panel, board |
| Shelf height | 11 in |
| Pieces | 16 |
| Build order | legs → aprons → shelf → top |
Cut list
| Qty | Part | Lumber | Length |
|---|---|---|---|
| 4 | Leg | 2x4 | 23.25 in |
| 2 | Apron | 2x4 | 13 in |
| 2 | Apron | 2x4 | 12.5 in |
| 2 | Shelf | 2x4 | 13 in |
| 1 | Shelf | panel | 15.5 in |
| 5 | Top board | board | 22 in |
Step by step
- Cut all 16 pieces to exact dimensions using a miter saw set to 90 degrees.
- Sand all individual boards to 120-grit before assembly to remove mill marks.
- Fasten the 23.25 in legs to the aprons to create two rigid side assemblies.
- Connect the two side assemblies with the remaining aprons to form the top perimeter frame.
- Mark 11 in from the leg bottoms and fasten the two 13 in shelf supports inside the base.
- Mount the 15.5 in shelf panel onto the lower supports using hidden screws from underneath.
- Edge-align the 5 top boards and verify the combined width measures exactly 17.5 in.
- Center the frame over the underside of the top boards with an even 1 in overhang.
- Fasten the top boards from below through pocket holes in the aprons.
- Sand the assembled piece to 220-grit and apply two coats of clear protective finish.
Finished Dimensions and Lumber Sizing
A minimalist design depends on balanced proportions. This nightstand reaches a finished size of 22 in wide, 17.5 in deep, and 24 in tall. That 24 in height sits flush with most modern mattress tops, making it practical for bedside reach. The top overhangs the base frame by 1 in on every side, creating a defined visual shadow line while preserving crisp right angles.
To hit these proportions, you need to account for true lumber sizing rather than nominal callouts. In this build, each 2x4 leg and apron measures 1.5 in by 3.5 in. The five surface boards are nominal 1x4 stock, which actually measures 0.75 in by 3.5 in. The single shelf panel measures 0.75 in thick by 13 in wide. If you design variations in TimberTinker, the app accounts for these actual thicknesses automatically so your joinery matches your material.
Storage space sits low to ground the piece visually. A single lower shelf rests 11 in up from the floor. This placement leaves open space underneath for floor cleaning, while providing vertical clearance above the shelf for books or a basket. Keeping the shelf open preserves sightlines and stops the thick 2x4 framing from looking bulky in a small bedroom.
Materials and the 16-Piece Cut List
Clean furniture starts at the miter saw. When every cut is square and exact, assembly pulls together without awkward gaps. You need 16 pieces cut from three standard lumber profiles: 2x4 framing stock, 0.75 in boards, and a 0.75 in panel. Crosscut each piece deliberately, checking your blade angle against a reliable square before you begin slicing into your lumber.
The frame uses ten structural 2x4 parts. Cut 4 legs to 23.25 in. Next, cut 2 wide aprons to 13 in and 2 narrow aprons to 12.5 in. For the lower shelf framing, cut 2 shelf supports to 13 in. These 2x4 cuts form the structural skeleton of the nightstand. Laying out your cut sequence in TimberTinker lets you verify your board breakdown and yield before you make the first cut at the workbench.
The horizontal surfaces require six additional boards. Cut 1 shelf panel to 15.5 in from the 0.75 in by 13 in panel stock. Finally, cut 5 top boards to 22 in from the 0.75 in by 3.5 in board material. When edge-aligned, five 3.5 in boards equal 17.5 in, which establishes your finished table depth. Group your pieces by dimension on your assembly bench to keep the workspace orderly.
How to Build a Clean Lined Nightstand Frame and Top
Assembly follows a strict four-stage order: legs, then aprons, then shelf, and finally the top. Begin with the 4 legs measuring 23.25 in. Position two legs on your workbench and secure an apron between them at the top edges using interior pocket screws or dowels. Repeat this for the opposite side. Then connect the two subassemblies with the remaining 2 aprons, using the 13 in aprons for the front and back and the 12.5 in aprons for the sides.
Next, install the lower shelf supports. Measure exactly 11 in up from the bottom of each leg and mark a reference line on the inside faces. Align the two 13 in shelf support 2x4s with these layout marks. Fasten them across the frame, checking across diagonals to guarantee the entire frame remains square. Drop the 15.5 in shelf panel onto the supports and secure it from beneath with wood screws to hide the fasteners.
Finish assembly by securing the tabletop. Arrange the 5 top boards across your workbench with their best faces pointing downward. Clamp them tightly along their long edges to eliminate gaps between the planks. Center the assembled nightstand frame upside down on top of the grouped boards, ensuring the top overhangs the frame by 1 in on all four perimeter edges. Drive screws upward through pocket holes in the aprons into the underside of the boards.
Because this design was created in TimberTinker and filmed board by board, following this order prevents you from trapping your drill inside tight frame corners. Installing the top last gives you open access to the lower frame during the entire structural assembly process.
Sanding and Protective Finishing
Crisp lines require smooth surfaces and flat transitions between parts. Dimensional 2x4 stock often carries rounded factory edges, surface stamps, and light mill glaze from commercial planers. Take the time to sand the outer faces of each joint flat. A random orbital sander removes factory mill stamps and smooths any microscopic lip where aprons meet the vertical legs.
Work progressively through your abrasive grits to avoid visible swirl marks. Begin with 80-grit sandpaper if you need to level joints or remove stubborn mill printing. Wipe away dust and step up to 120-grit across all surfaces, paying close attention to the exposed end grain on the legs. Finish your prep work with a thorough pass of 180-grit or 220-grit paper over the five top boards, easing the sharp outer corners by hand with a single light stroke.
Clean away wood dust with a dry tack cloth before applying finish. A clear matte polyurethane or a hardening furniture oil protects the pale wood while preserving its natural look. Matte and satin finishes work particularly well on clean-lined pieces because they prevent harsh reflections from obscuring the geometry of the frame. Apply two thin coats to the base and three coats to the tabletop, scuffing lightly between coats with a fine abrasive pad.
Building a clean lined nightstand does not require specialty hardwood or complex machinery. By following this 16-piece cut list and maintaining square joints through the four-step assembly, you produce a solid bedside table from ordinary framing lumber. Place it next to your bed, add a lamp, and enjoy a piece built to last.
Questions
What joinery method works best for attaching the aprons without visible screw heads?
Pocket hole joinery drilled into the interior face of each 2x4 apron is the most straightforward method. Drilling two pocket holes at each end allows you to draw the aprons tight against the legs from the inside. Wood glue along the contact surfaces adds long-term strength while keeping the exterior faces clean.
Can I substitute edge-banded plywood for the solid lumber top boards?
Yes, you can swap the five individual top boards for a single sheet of 0.75 in plywood cut to 22 in by 17.5 in. Cover the exposed plywood edges with iron-on veneer edge banding to match the clean aesthetic. The finished nightstand retains the exact same footprint and 1 in overhang.

Try TimberTinker for yourself.
Get TimberTinkerWant more like this? Leave your email and I'll send the good stuff only.