How to Build an Entryway Bench: Chunky 40-Inch DIY Plan
Build a 40-inch chunky entryway bench with a lower shoe shelf using dimensional lumber and an exact 15-piece cut list.
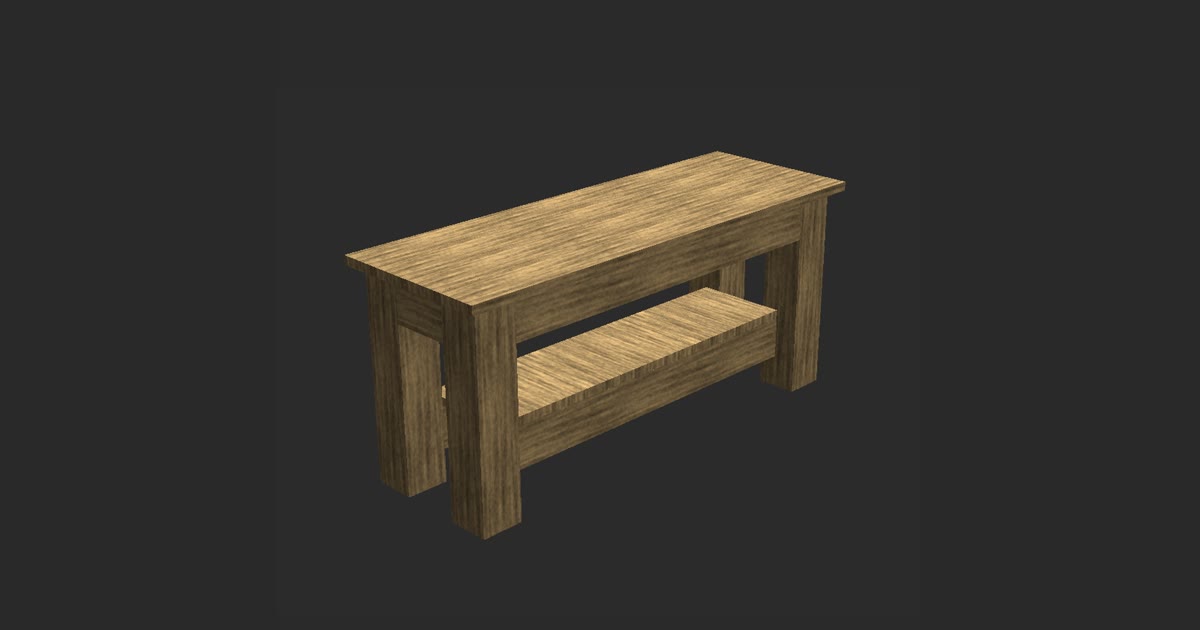
Learning how to build an entryway bench comes down to cutting 15 parts to length and assembling a square, rigid frame. This Chunky Entryway Bench measures 40 in wide by 14 in deep and 18 in tall, providing a solid seat with a dedicated shoe shelf underneath. Standard construction lumber gives the piece substantial weight and stability for heavy daily use.
We designed this project in TimberTinker, a 3D woodworking design app, to calculate every dimension and joint before making sawdust. In this guide, you will find the complete cut list, actual lumber profiles, screw specifications, and assembly instructions.
| Finished size | 40 in wide × 14 in deep × 18 in tall |
|---|---|
| Lumber | 4x4, 2x4, panel, board |
| Shelf height | 7 in |
| Pieces | 15 |
| Build order | legs → aprons → shelf → top |
Cut list
| Qty | Part | Lumber | Length |
|---|---|---|---|
| 4 | Leg | 4x4 | 17.25 in |
| 2 | Apron | 2x4 | 31 in |
| 2 | Apron | 2x4 | 5 in |
| 2 | Shelf | 2x4 | 31 in |
| 1 | Shelf | panel | 8 in |
| 4 | Top board | board | 40 in |
Step by step
- Cut the four 4x4 legs to 17.25 in and square both ends.
- Cut all 2x4 aprons, shelf rails, top boards, and the 0.75 in × 8 in × 31 in panel to length.
- Drill pocket holes on the interior faces of the 2x4 aprons and shelf rails.
- Join the two 5 in aprons between leg pairs using screws driven into the pockets to build the side frames.
- Connect the side frames with the two 31 in aprons, driving screws through the angled joints.
- Install the two 31 in shelf rails 7 in above the floor by driving screws through the interior pockets.
- Fasten the 0.75 in × 8 in × 31 in shelf panel over the shelf rails from underneath.
- Secure the four 40 in top boards flush to the frame from underneath.
- Sand all surfaces to 180-grit and apply protective polyurethane or hardwax oil.
Dimensions and Sizing for the Entryway Bench
The finished bench measures 40 in wide by 14 in deep and 18 in tall. An 18 in seat height matches standard dining chairs, which places your knees at a comfortable angle while tying shoes. The 14 in depth keeps the frame compact enough for tight hallways without sacrificing balance. Across the 40 in width, two adults can sit comfortably side by side.
The build features a flush top where the seat boards align directly with the outer faces of the 4x4 legs. This zero-overhang design produces square corners that do not snag coats or tote bags. You can follow each step of this geometry in the embedded video player below, which shows the TimberTinker model built board by board in the shop.
A lower shelf sits 7 in up from the floor. This 7-inch clearance leaves open space below for flat shoes, while the distance between the shelf and upper aprons handles taller work boots. The shelf rails also tie the four legs together, reinforcing the base against racking forces.
Materials and the 15-Piece Cut List
Construction lumber requires planning around actual surfaced dimensions rather than nominal names. A 4x4 post is actually 3.5 in × 3.5 in. A 2x4 is 1.5 in × 3.5 in. Top boards measure 0.75 in × 3.5 in. The shelf panel is 0.75 in thick. Understanding these actual numbers ensures your joints align flush across the 14 in depth and 40 in width.
The complete cut list contains 15 lumber pieces. Cut four legs from 4x4 lumber to 17.25 in. For the upper apron assembly, cut two 2x4 pieces to 31 in for the long rails and two 2x4 pieces to 5 in for the short end rails. The lower shelf assembly requires two 2x4 rails cut to 31 in, along with one shelf panel measuring 0.75 in × 8 in × 31 in. Finally, cut four top boards to 40 in to build the flush seat surface.
Take time to verify that both ends of each 17.25 in leg are cut at true 90-degree angles. Thick 4x4 posts reveal minor miter saw blade deflection quickly. Flat, square ends ensure that the bench sits evenly on the floor without wobbling.
How to Build an Entryway Bench: Step-by-Step Assembly
Assembly proceeds in four stages: legs, aprons, shelf, and top boards. Start by drilling pocket holes into the 2x4 aprons and lower shelf rails. Drill all pocket holes on the interior faces of the aprons and shelf rails so hardware is concealed from the exterior. Set your pocket hole jig for 1.5-inch stock, and use 2 1/2-inch pocket hole screws for every joint connecting a 2x4 to a 4x4 leg.
Build the two end assemblies first. Clamp a 5 in apron flush between two 17.25 in legs at the top edge, making sure the pocket holes face inward. Drive the fasteners through the angled holes to secure each joint. Repeat for the other two legs to complete both side frames. Next, connect the two side frames using the two 31 in aprons. Measure diagonally across opposing corners to check that the frame is square before driving the remaining screws home.
Attach the lower shelf framing next. Position the two 31 in 2x4 shelf rails between the legs at 7 in above the floor, with their pocket holes facing inward and downward. Secure them to the 4x4 legs through the pre-drilled pockets. Drop the 0.75 in × 8 in × 31 in panel into place across the rails. Fasten the panel into the rails using 1 1/4-inch screws driven from underneath.
Finish the structure by securing the four 40 in top boards. Set the boards edge to edge across the frame to establish the 14 in bench depth. Align the outer perimeter flush with the 4x4 legs. Fasten the top boards from underneath through pocket holes drilled upward into the upper aprons. This concealed attachment method leaves the top seating surface clean and free of visible screw heads.
Sanding and Protective Sealing
Begin surface prep with 80-grit abrasive on a random orbital sander to remove mill stamps and smooth out transition lines between boards. Move up to 120-grit, and finish with 180-grit across all visible faces. Break sharp edges along the seat slats and leg corners by hand with a 180-grit sanding block to prevent splintering.
Remove all sanding dust with a shop vacuum and a tack cloth. If you want a tinted look, wipe on an oil-based interior wood stain, then wipe away the excess after five minutes. For clear protection, apply three coats of satin polyurethane or hardwax oil. Lightly sand between cured coats with a 320-grit pad to remove dust nibs, wiping clean before the next application.
Building this chunky entryway bench gives you a solid piece of mudroom furniture made from standard materials. Following the 15-piece cut list and hiding your joinery on the inside faces produces a bench that resists daily foot traffic. Set aside four or five hours in your shop to complete the cuts and assembly.
Questions
What screws should I use when building an entryway bench?
Fasten the 2x4 aprons and shelf rails into the 4x4 legs using 2 1/2-inch coarse fasteners. For attaching the 0.75 in shelf panel and the four top boards, drive shorter fasteners from underneath so they bite into the 3/4-inch stock without poking through the seat.
Why does this entryway bench have a flush top without an overhang?
A flush top keeps the bench compact in narrow entryways and prevents bags or coats from catching on protruding corners. Aligning the boards flush with the 3.5 in × 3.5 in legs also creates a clean, blocky profile.

Try TimberTinker for yourself.
Get TimberTinkerWant more like this? Leave your email and I'll send the good stuff only.