How to Build a Dining Bench: Farmhouse Woodworking Plan
Build a 66-inch farmhouse pine dining bench with a 12-piece cut list, flush joints, and pocket-hole joinery.
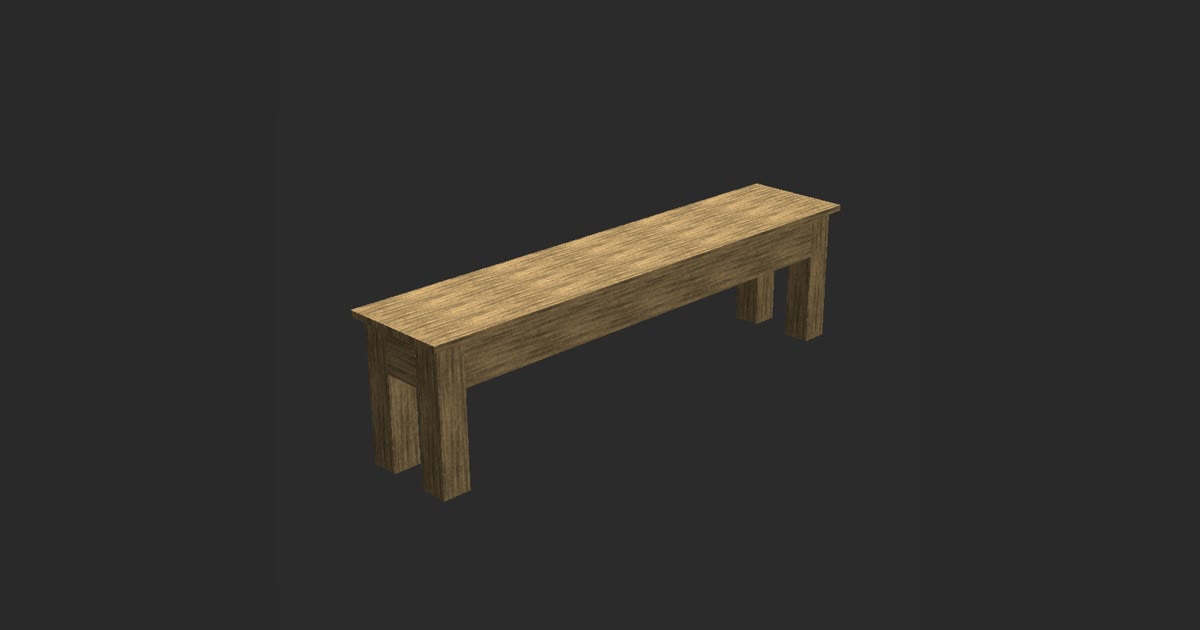
Learning how to build a dining bench starts with assembling four legs and four aprons into a rigid base before securing the top. This farmhouse design relies on thick 4x4 legs and 2x6 aprons to create a stable seat for daily meals.
This guide details the complete construction of a 66-inch farmhouse pine dining bench. You will find the exact 12-piece cut list alongside edge-ripping measurements and assembly steps to finish the project in your shop.
| Finished size | 66 in wide × 13 in deep × 18 in tall |
|---|---|
| Lumber | 4x4, 2x6, board |
| Pieces | 12 |
| Build order | legs → aprons → top |
Cut list
| Qty | Part | Lumber | Length |
|---|---|---|---|
| 4 | Leg | 4x4 | 17.25 in |
| 2 | Apron | 2x6 | 57 in |
| 2 | Apron | 2x6 | 5 in |
| 4 | Top board | board | 66 in |
Step by step
- Cut four 4x4 legs to 17.25 inches using a miter saw.
- Cut two 2x6 aprons to 5 inches and two 2x6 aprons to 57 inches.
- Cut four seat boards to 66 inches, and rip 0.5 inches off the outer edge of the two exterior boards to achieve a 13-inch panel depth.
- Drill pocket holes set for 1.5-inch stock into both ends of all four 2x6 aprons, plus upward-facing pocket holes along the top interior edges.
- Fasten the 5-inch aprons flush between pairs of 4x4 legs using 2-1/2-inch pocket screws to build two end frames.
- Join the two end frames with the 57-inch aprons, checking that opposing diagonal measurements match.
- Apply wood glue to the edges of the four 66-inch seat boards, clamp them tight edge-to-edge, and position the panel flush with the base perimeter.
- Drive 1-1/4-inch pocket screws upward through the apron pocket holes into the underside of the 0.75-inch seat boards.
- Sand the wood smooth, then apply pre-stain conditioner followed by stain. Once dry, seal the bench with three coats of polyurethane.
Bench Sizing and Dining Table Clearance
This dining bench finishes at 66 inches wide and 13 inches deep, reaching an overall height of 18 inches. The 18-inch seat height matches standard dining chairs, leaving comfortable knee clearance under a dining table. At 66 inches wide, the bench seats three adults comfortably.
The top sits flush with the frame, leaving no overhang on the front or sides. Many commercial benches feature wide top overhangs that collide with table legs when you push the bench inward. By keeping the seat perimeter flush with the 4x4 posts, this bench slides between table legs and clears the dining room walkway.
Confirming clearances before cutting saves lumber and shop time. TimberTinker lets you model the bench against your dining table dimensions to verify leg spans and heights before buying materials. Checking your table's interior span between legs ensures that the 66-inch frame clears the opening with plenty of space on each end.
Lumber Requirements and the 12-Piece Cut List
Building furniture with dimensional pine requires working with actual board measurements rather than nominal store names. In this project, a 4x4 post measures 3.5 inches by 3.5 inches. A 2x6 apron measures 1.5 inches by 5.5 inches. Each top board measures 0.75 inches thick by 3.5 inches wide. Accounting for these exact dimensions prevents alignment errors during framing.
The build requires 12 cut pieces. Cut four 4x4 legs to 17.25 inches. For the base frame, cut two 2x6 aprons to 57 inches and two 2x6 aprons to 5 inches. For the seat, cut four boards to 66 inches. When the 0.75-inch seat rests on the 17.25-inch legs, the bench reaches its target 18-inch finished height. There are no shelves below the top.
Four unmodified 3.5-inch boards placed edge-to-edge produce a panel 14 inches deep. Because the finished bench depth is 13 inches, you must remove one inch across the width. Rip 0.5 inches off the outer edge of each exterior seat board on a table saw, reducing those two pieces to 3 inches wide. When joined with the two center 3.5-inch boards, the glued seat panel measures exactly 13 inches deep and aligns flush with the frame.
Reviewing the cut list in TimberTinker lets you verify board lengths and grain direction before making cuts. The free mobile app also calculates board-foot costs so you know your material budget in advance. At the lumber yard, sight down the edge of each board to avoid severe bow or twist. Let your pine rest in your workshop for several days so its moisture content stabilizes before milling.
How to Build a Dining Bench: Assembly Order
The build order begins with the legs. Next come the aprons, followed by the top. The accompanying video documents this exact build board by board on film, following the 3D model designed in TimberTinker.
Set your pocket-hole jig for 1.5-inch stock. Drill two pocket holes into each end on the inside faces of both 5-inch aprons and both 57-inch aprons. Next, drill upward-facing pocket holes along the top interior edge of all four aprons to fasten the seat later. Position one 5-inch apron flush between two 17.25-inch legs, align the top edges, and secure the joint using 2-1/2-inch pocket screws. Repeat with the second short apron to complete two end frames.
Connect the two end assemblies using the two 57-inch aprons. Clamp each long apron flush with the top and outside faces of the 4x4 legs. Drive screws through the aprons into the legs. Measure opposing diagonals across the frame with a tape measure; matching diagonal numbers confirm your base is square.
Edge-glue the four 66-inch seat boards together with wood glue. Clamp the boards tight edge-to-edge until the glue sets, forming a single 66-inch panel that is 13 inches deep. Center the panel over the base frame so the perimeter sits flush with the exterior faces of the 4x4 legs. Fasten the seat by driving 1-1/4-inch pocket screws upward through the apron pocket holes into the underside of the 0.75-inch boards. Screws longer than 1-1/4 inches will punch through the top surface.
Sanding, Staining, and Protective Finishing
Pine features alternating bands of soft and dense wood grain that absorb liquid stain at different rates. Sand all visible surfaces with a random orbital sander, progressing from 120-grit to 180-grit discs. Wipe the wood with a damp rag to raise the grain. Once dry, hand-sand lightly with 220-grit sandpaper for a smooth feel.
Apply an even coat of pre-stain wood conditioner across all exterior surfaces before applying stain. The conditioner saturates porous earlywood fibers to reduce blotching. Allow the conditioner to penetrate for ten minutes before wiping off excess liquid with a clean cloth. Apply your oil-based wood stain within two hours.
Dining furniture regularly encounters moisture and food spills. Seal the stained pine bench with three thin coats of clear polyurethane. Scuff the finish between coats using a fine abrasive pad, vacuuming away dust before the next layer.
Building your own dining bench gives you a solid piece scaled to your exact dining room space. With the base squared and the seat secured flush to the frame, this farmhouse bench will handle daily meals for years to come.
Questions
How much weight can a solid 4x4 farmhouse dining bench support?
A bench built with solid 4x4 legs and 2x6 aprons easily supports multiple adults. The structural strength comes from the thick square posts and wide apron boards, which transfer downward weight directly into the floor without racking or bowing during daily use.
What is the best way to prevent dining bench legs from scratching hardwood floors?
Heavy-duty felt furniture pads applied to the bottom of each 4x4 leg protect hardwood flooring. Clean the cut end of each leg thoroughly before sticking on pads, and select thick wool felt discs that match the 3.5-inch square leg footprint to prevent floor scuffs when sliding the bench.

Try TimberTinker for yourself.
Get TimberTinkerWant more like this? Leave your email and I'll send the good stuff only.