How to Build a Shoe Bench with 2x4s and 2x6s
Build a sturdy 38-inch shoe bench from standard 2x4 and 2x6 lumber with an exact 11-piece cut list and clear assembly order.
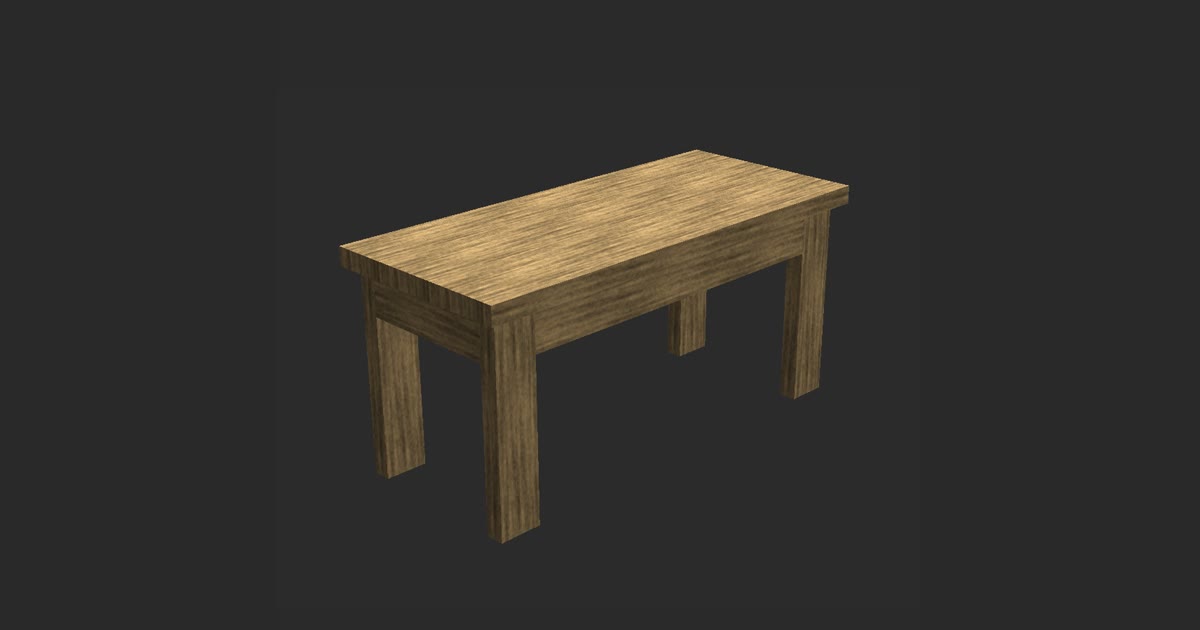
Learning how to build a shoe bench from 2x4 and 2x6 lumber gives you a sturdy seat designed for daily family use. To assemble the piece, join four 2x4 legs to four 2x4 aprons, then fasten three 2x6 boards across the top frame. This construction produces an 18-inch seat height and leaves an open base below for dirty boots and everyday sneakers.
This guide covers the exact dimensions and the 11-piece cut list, following a clean build order from the legs to the top.
| Finished size | 38 in wide × 16.5 in deep × 18 in tall |
|---|---|
| Lumber | 2x4, 2x6 |
| Pieces | 11 |
| Build order | legs → aprons → top |
Cut list
| Qty | Part | Lumber | Length |
|---|---|---|---|
| 4 | Leg | 2x4 | 16.5 in |
| 2 | Apron | 2x4 | 29 in |
| 2 | Apron | 2x4 | 11.5 in |
| 3 | Top board | 2x6 | 38 in |
Step by step
- Cut the four 2x4 legs to 16.5 inches, two 2x4 aprons to 29 inches, two 2x4 aprons to 11.5 inches, and three 2x6 top boards to 38 inches.
- Drill pocket holes on the inside faces and ends of all four apron boards.
- Join two legs with one 11.5-inch short apron using glue and pocket screws to build the first end assembly.
- Repeat the process with the remaining two legs and the second short apron to create the matching end assembly.
- Fasten the two 29-inch long aprons between the two end assemblies to complete the rectangular base frame.
- Align the three 38-inch 2x6 boards edge to edge, clamping them flat to form the 16.5-inch deep bench top.
- Position the assembled base frame onto the underside of the top boards, centering it with an even 1-inch overhang on all sides.
- Drive screws through the inside apron pocket holes into the underside of the top boards.
- Sand all surfaces smooth up to 220-grit and apply your choice of paint or polyurethane sealer.
Dimensions and Sizing: Why 38 × 16.5 × 18 Inches Works
A standard dining chair sits between 17 and 19 inches off the floor. Setting the top surface of this bench at exactly 18 inches tall makes putting on work boots or tying sneakers comfortable for both adults and children. The 18-inch height accounts for a 1.5-inch thick wooden seat resting on 16.5-inch legs, which prevents knee strain while you lean forward.
The overall footprint measures 38 inches wide by 16.5 inches deep. A 38-inch width fits neatly into small foyers or hallway corners while providing space for two seated adults. It also parks shoes directly underneath along the floor.
The top overhangs the perimeter base frame by exactly 1 inch on every side. This 1-inch reveal prevents heels from bumping the lower 2x4 frame when you sit down. The overhang also provides a clean finger grip if you need to pull the bench away from the wall.
Leaving the lower section open without fixed bottom shelves keeps your entryway cleaner. Mud and grit fall directly onto your home floor, where you can sweep them away quickly.
Materials, Tools, and the 11-Piece Cut List
Before making any cuts, remember that dimensional construction lumber runs smaller than its nominal name. A standard 2x4 measures 1.5 inches by 3.5 inches in actual profile, while a 2x6 board measures 1.5 inches by 5.5 inches. Placing three 2x6 boards edge-to-edge produces a total depth of 16.5 inches, matching the depth profile without ripping boards on a table saw.
This design was made in TimberTinker and built board by board on film; the guide's video shows the same build. Modeling the joint overlaps in 3D confirms how pieces line up before you touch a saw.
You need basic workshop tools: a miter saw, a pocket hole jig, a drill driver, and bar clamps. Stock up on 2.5-inch pocket hole screws designed for 1.5-inch thick material, wood glue, and sandpaper.
The complete project requires only 11 cut pieces from standard boards: - 4 Leg pieces (2x4) cut to 16.5 inches - 2 Long Aprons (2x4) cut to 29 inches - 2 Short Aprons (2x4) cut to 11.5 inches - 3 Top Boards (2x6) cut to 38 inches
How to Build a Shoe Bench: Step-by-Step Frame and Top Assembly
Begin assembly with the four 16.5-inch legs and the two short 11.5-inch aprons. Drill two pocket holes into both ends of each short apron board, placing them on the back faces so the fasteners stay hidden. Place two legs flat on your workbench, position one short apron flush with the top ends of the legs, apply wood glue, clamp the joint tight, and drive the pocket screws. Repeat this step to build two identical end leg assemblies.
Next, connect the two end assemblies using the two 29-inch long aprons. Drill two pocket holes into both ends of each long apron, as well as upward-facing pocket holes along the inside faces to attach the seat boards later. Stand the two end assemblies on edge, clamp the long aprons flush with the leg tops, and secure them with pocket screws. Check the perimeter frame with a framing square across all four corners to confirm square alignment.
Prepare the bench seat by placing the three 38-inch 2x6 boards face down on your workbench. Arrange the boards so the growth rings alternate up and down to minimize board cupping over time. Clamp the three boards tightly together along their edges with wood glue between the joints to lock the panel into a single top.
Center the completed base frame upside down onto the underside of the top boards. Measure the edges to ensure a uniform 1-inch overhang on all sides. Drive screws through the upward-facing apron holes directly into the underside of the top boards, locking the frame and seat together.
Sanding, Edge Softening, and Durable Finishes
Construction lumber often arrives with rough milling marks and ink stamps. Sand all outer surfaces with 120-grit sandpaper to remove factory markings, then work up to 180-grit and 220-grit on the bench top. Soften any sharp cut ends by hand-sanding a gentle 1/8-inch bevel along the edges so the seat feels smooth against clothing.
Fill any visible pocket holes or knot voids on the inner frame using wood filler or wooden plugs. Sand the filled areas flush with your base boards once the filler cures.
Entryway benches face abrasive dirt and moisture, so the finish must protect the wood. If you prefer natural grain, apply an oil-based stain followed by clear satin polyurethane. Allow each coat to dry overnight, and lightly scuff the surface with 320-grit paper between applications.
If you want a painted look, apply an oil primer to block pine knots from bleeding through. Finish with two coats of semi-gloss enamel paint on the base legs and frame, which allows you to wipe scuff marks off with a damp rag.
Building your own entryway furniture gives you a solid piece tailored to your home without spending retail prices. Built from a simple frame and a thick three-board seat, this 11-piece shoe bench delivers reliable seating and practical floor storage that handles everyday use for years to come.
Questions
How much weight can a solid 2x4 and 2x6 shoe bench support?
When built with tight wood joints and pocket screws, this bench supports heavy adult seating without flexing. The upright 2x4 legs carry direct downward compression, while the 1.5-inch thick 2x6 top boards prevent center sagging.
Can an open-bottom shoe bench design be retrofitted with a lower shelf later?
Yes. You can add lower 2x4 stretchers between the legs above the floor and attach wooden slats or a plywood panel across them. Keep in mind that open designs make sweeping dirt off the entryway floor much easier.

Try TimberTinker for yourself.
Get TimberTinkerWant more like this? Leave your email and I'll send the good stuff only.