How to Build a Tiered Plant Stand from Pine
Build a sturdy 30-inch pine tiered plant stand with this complete 14-piece cut list, exact dimensions, and step-by-step assembly guide.
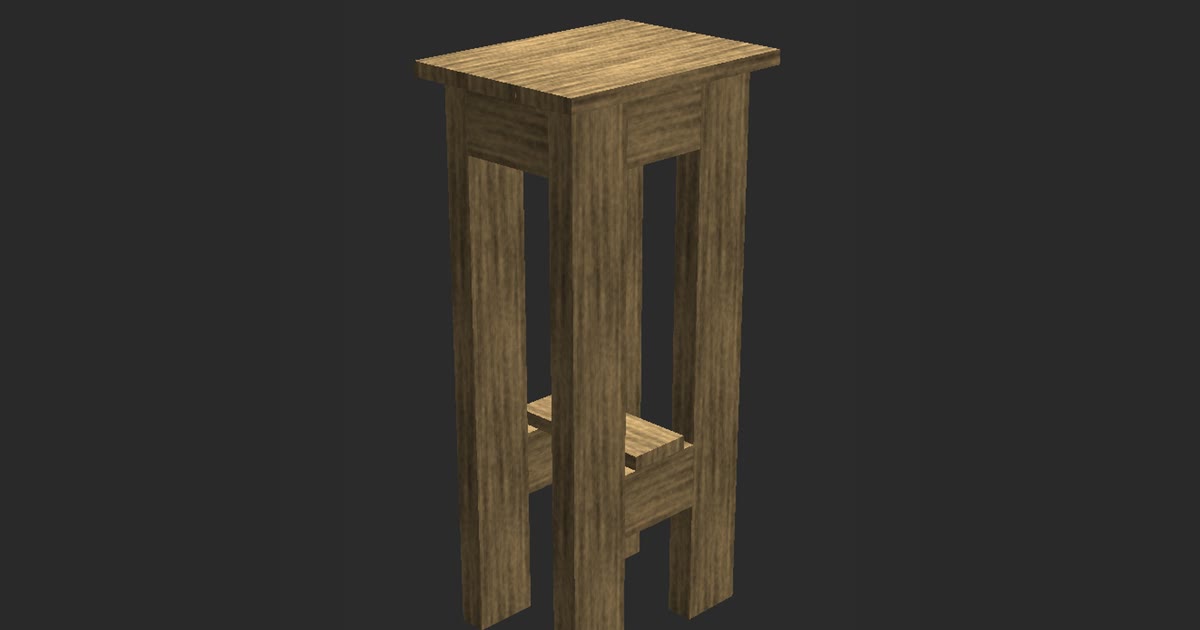
If you want to know how to build a tiered plant stand, cut four pine 2x4 legs to 29.25 inches, join them with four aprons, attach lower shelf supports, and secure three 14-inch top boards. This build produces a compact two-tier stand measuring 14 inches wide, 11 inches deep, and 30 inches tall. The frame handles heavy terracotta pots without wobbling.
This project was designed in the TimberTinker app and built board by board on film. The accompanying step-by-step video documents the build in real time, following the exact sequence: legs, aprons, shelf, and top.
| Finished size | 14 in wide × 11 in deep × 30 in tall |
|---|---|
| Lumber | 2x4, board |
| Pieces | 14 |
| Build order | legs → aprons → shelf → top |
Cut list
| Qty | Part | Lumber | Length |
|---|---|---|---|
| 4 | Leg | 2x4 | 29.25 in |
| 2 | Apron | 2x4 | 5 in |
| 2 | Apron | 2x4 | 5.5 in |
| 2 | Shelf | 2x4 | 5 in |
| 1 | Shelf | board | 8.5 in |
| 3 | Top board | board | 14 in |
Step by step
- Cut all 14 pine pieces to length using a miter saw according to the cut list.
- Fasten one 5-inch apron flush between the tops of two 29.25-inch legs to build the first leg pair.
- Repeat the process with the remaining two legs and the second 5-inch apron to complete the second leg pair.
- Connect the two leg pairs with the two 5.5-inch aprons to create the four-legged frame.
- Measure 10 inches up from the bottom of each leg and fasten the two 5-inch shelf supports horizontally.
- Attach the 8.5-inch shelf board across the lower shelf supports.
- Position the three 14-inch top boards over the upper aprons with a 1-inch overhang on all sides and 1/8-inch gaps between boards.
- Fasten the top boards to the aprons, sand all surfaces, and apply three coats of water-resistant exterior finish.
Plant Stand Dimensions and Frame Overview
A heavy pot filled with wet soil requires a rigid base. This build produces an assembled stand measuring 14 inches wide, 11 inches deep, and 30 inches tall. The primary frame sits inside the upper surface perimeter, allowing the top boards to overhang the frame by 1 inch on all four sides. This overhang sheds stray watering spills past the apron joints and gives the stand balanced proportions.
When buying materials, remember that nominal lumber labels differ from actual dimensions. A construction 2x4 is 1.5 inches by 3.5 inches in true thickness and width. The 1x4 pine board used for the top and shelf surfaces is 0.75 inches thick by 3.5 inches wide. Overlooking these actual milled dimensions causes misalignment in handmade furniture. Modeling the project in TimberTinker accounts for true stock measurements before making the first cut.
The two tiers balance utility and stability. The lower shelf sits low on the legs to anchor the stand with a heavy bottom pot. The upper tier puts light-loving greenery at a 30-inch height. This offset spacing ensures the lower plant receives plenty of ambient sunlight while keeping the overall center of gravity near the floor.
Materials and the Complete 14-Piece Cut List
Select straight, knot-free pine from your lumber supplier. You need two 8-foot 2x4 studs and one 8-foot 1x4 board (0.75 in × 3.5 in). Use a miter saw with a stop block to make clean, repeatable crosscuts across all matching parts.
The project consists of 14 pieces in total: • 4 × Leg: 2x4 at 29.25 in • 2 × Side Apron: 2x4 at 5 in • 2 × Front/Back Apron: 2x4 at 5.5 in • 2 × Shelf Support: 2x4 at 5 in • 1 × Shelf Board: board (0.75 in × 3.5 in) at 8.5 in • 3 × Top Board: board (0.75 in × 3.5 in) at 14 in
Label each piece lightly with a pencil on the end grain after cutting. Separating the 5-inch side aprons from the 5.5-inch front and back aprons now prevents confusion during assembly.
How to Build a Tiered Plant Stand: Step-by-Step Assembly
Start assembly with the legs. Lay two 29.25-inch legs flat on your bench with the 3.5-inch faces facing up. Place a 5-inch 2x4 apron flush between the tops of the two legs. Drill pocket holes on the inner face of the apron, or pre-drill for 2.5-inch exterior wood screws driven through the outside edges of the legs. Fasten the parts firmly. Repeat this step with the second pair of legs and the other 5-inch apron to make two matching U-shaped leg assemblies.
Stand both assemblies upright. Join them together using the two 5.5-inch aprons across the front and rear. Check every corner with a speed square before driving your screws. Securing these aprons creates a rigid, four-legged box frame standing 29.25 inches tall.
Install the lower tier next. Measure exactly 10 inches up from the bottom of each leg and mark a pencil line on the inside face. Align the top edges of the two 5-inch shelf supports with these 10-inch marks. Clamp both supports horizontally across the side spans and drive 2.5-inch screws through the supports into the legs. Set the 8.5-inch shelf board across the two supports and screw it down from above.
Complete the build by installing the three 14-inch top boards. Lay the boards across the top aprons, leaving an even 1/8-inch drainage gap between them. Center the surface so the boards overhang the outer frame by 1 inch on every edge. Fasten the boards through the aprons from below using pocket screws, or drive finish screws down from the top.
Sanding and Moisture-Resistant Finishing
Plant stands face regular contact with drainage water and damp pots. Sand all pine surfaces with 120-grit paper to remove mill marks, then finish with 180-grit paper along the grain. Soften all sharp board edges with a light sanding pass to keep the finish from thinning at the corners.
End grain draws moisture quickly. Coat the bottom feet of the 2x4 legs and the ends of the top boards with an exterior wood sealer or water-resistant wood glue prior to painting or staining. This barrier blocks water wicking from wet patio pavers or indoor drainage trays.
Apply three coats of exterior spar urethane or a water-resistant deck oil over all surfaces. Allow each coat to dry according to the manufacturer guidelines, scuffing lightly with 320-grit paper between layers. Let the final coat cure for 48 hours before placing potted plants on the tiers.
Building a two-tier pine plant stand gives you dependable support for heavy pots on a small footprint. With square cuts and a quality exterior finish, this stand keeps your plants organized and healthy for years.
Questions
What is the best joinery method for connecting the 2x4 legs and aprons?
Pocket hole joinery placed on the inside faces of the aprons provides a clean look by hiding fasteners. Alternatively, pre-drill and drive 2.5-inch exterior wood screws through the outside of the legs into the aprons.
Can this tiered stand design be kept outdoors on an uncovered patio?
Standard pine works outdoors if sealed properly. Apply three coats of exterior spar varnish or penetrating deck stain, and use exterior-grade screws to prevent rust. Attaching rubber pads beneath the leg ends stops ground moisture from wicking into the end grain.

Try TimberTinker for yourself.
Get TimberTinkerWant more like this? Leave your email and I'll send the good stuff only.